Embarking on the journey of preparing for a baby shower can be as exciting as it is daunting, but fear not! We’re here to make it a breeze with some DIY magic. Imagine crafting bespoke baby shower boxes filled with love and creating balloon walls that tell a story. In this guide, we’ll walk you through the steps to make these dreamy decorations with ease. From selecting the perfect palette to the final flourish of ribbons and confetti, we’ll ensure your baby shower is the talk of the town. So, let’s roll up our sleeves and dive into a world of color, creativity, and celebration!
Materials You Need:
4 Pack Metallic Iridescent Letter StickersWhite Transparent Balloon Boxes
Pink Latex Balloons
Metallic Chrome Gold Balloons
Balloon Air Inflator
Balloon Column Stand
What You Need to Do:
Creating a baby shower box and balloon wall decor can be a delightful project. Here’s a step-by-step guide to help you assemble a beautiful display:
Step 1: Prepare the Balloon Boxes
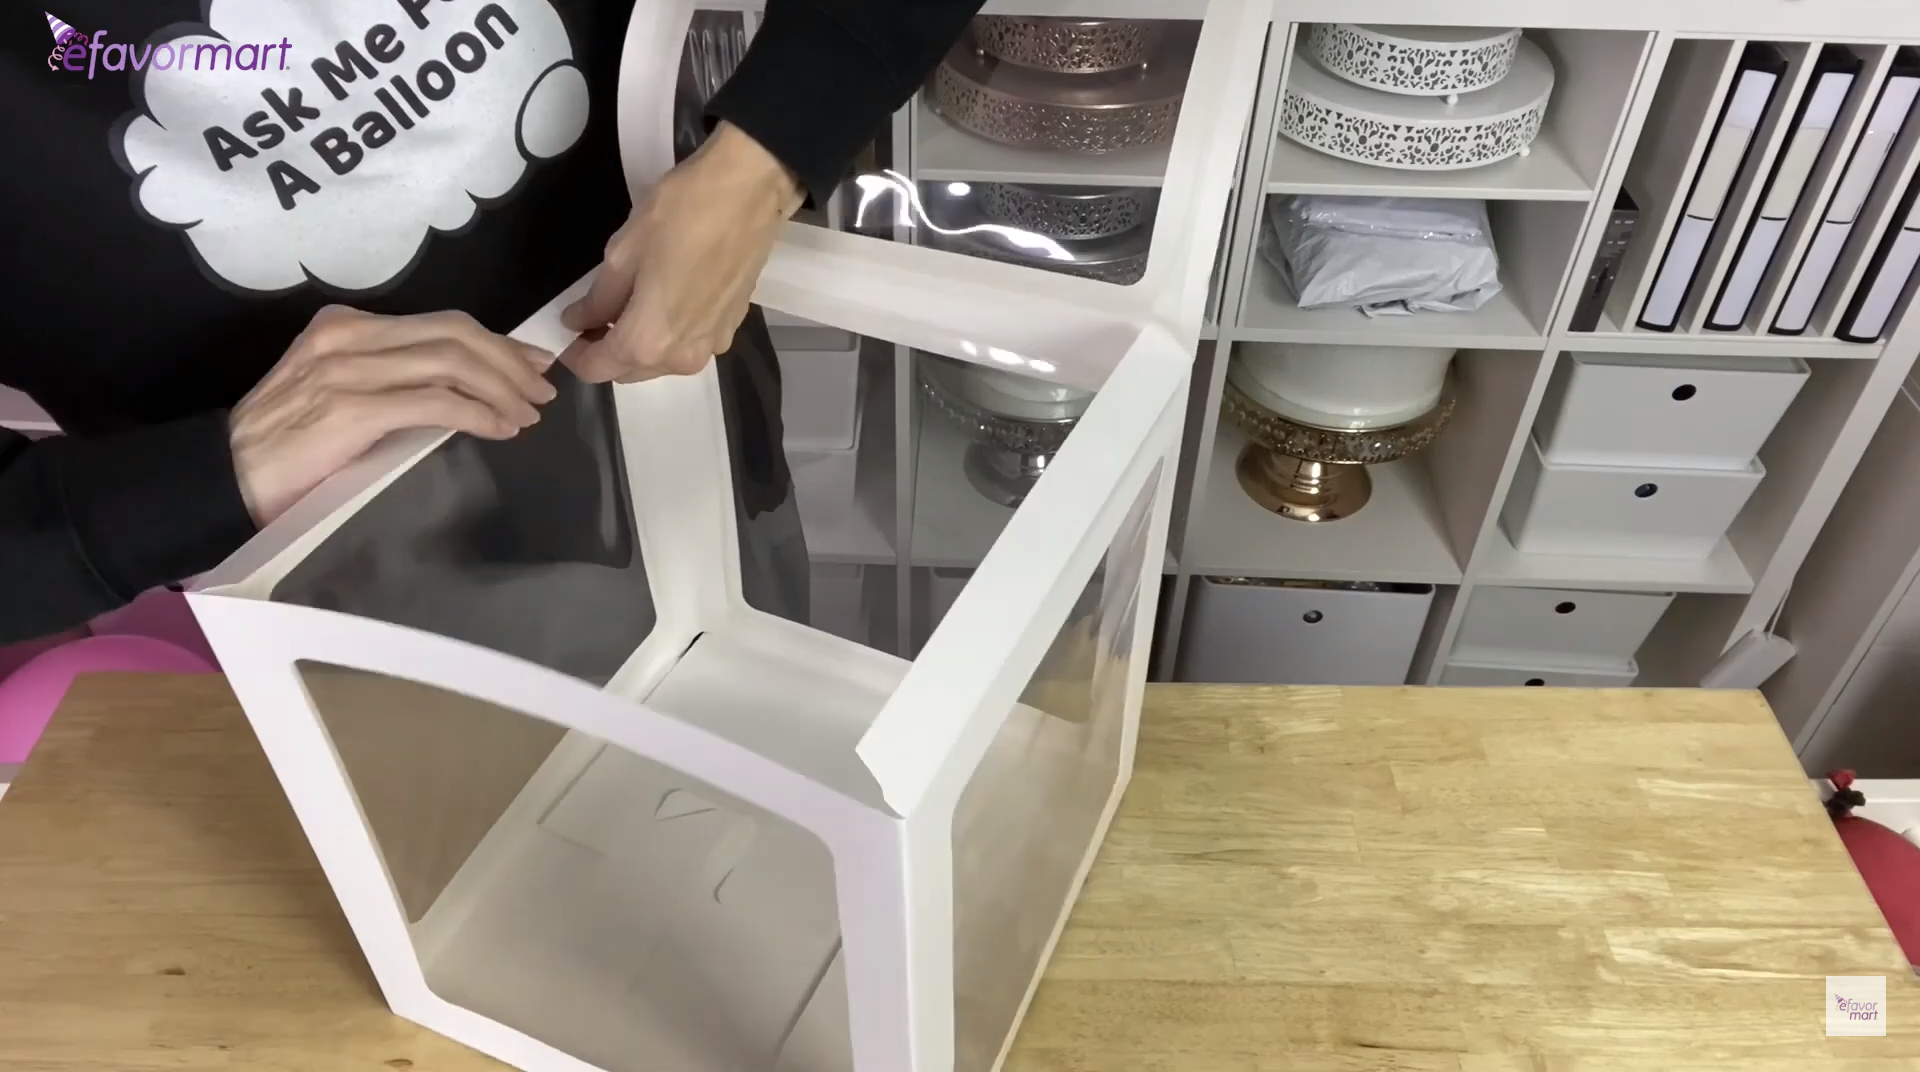
Start by assembling your white transparent balloon boxes according to the manufacturer’s instructions. Make sure each box is secure and stable. This will be the foundation of your decor, so take your time to get it right.
Step 2: Inflate the Balloons

Using your balloon air inflator, begin to inflate your pink latex balloons that will be displayed in the box. Aim for a consistent size to ensure a uniform look in your decor. Once inflated, tie them off securely to prevent any air from escaping.
Step 3: Fill the Boxes
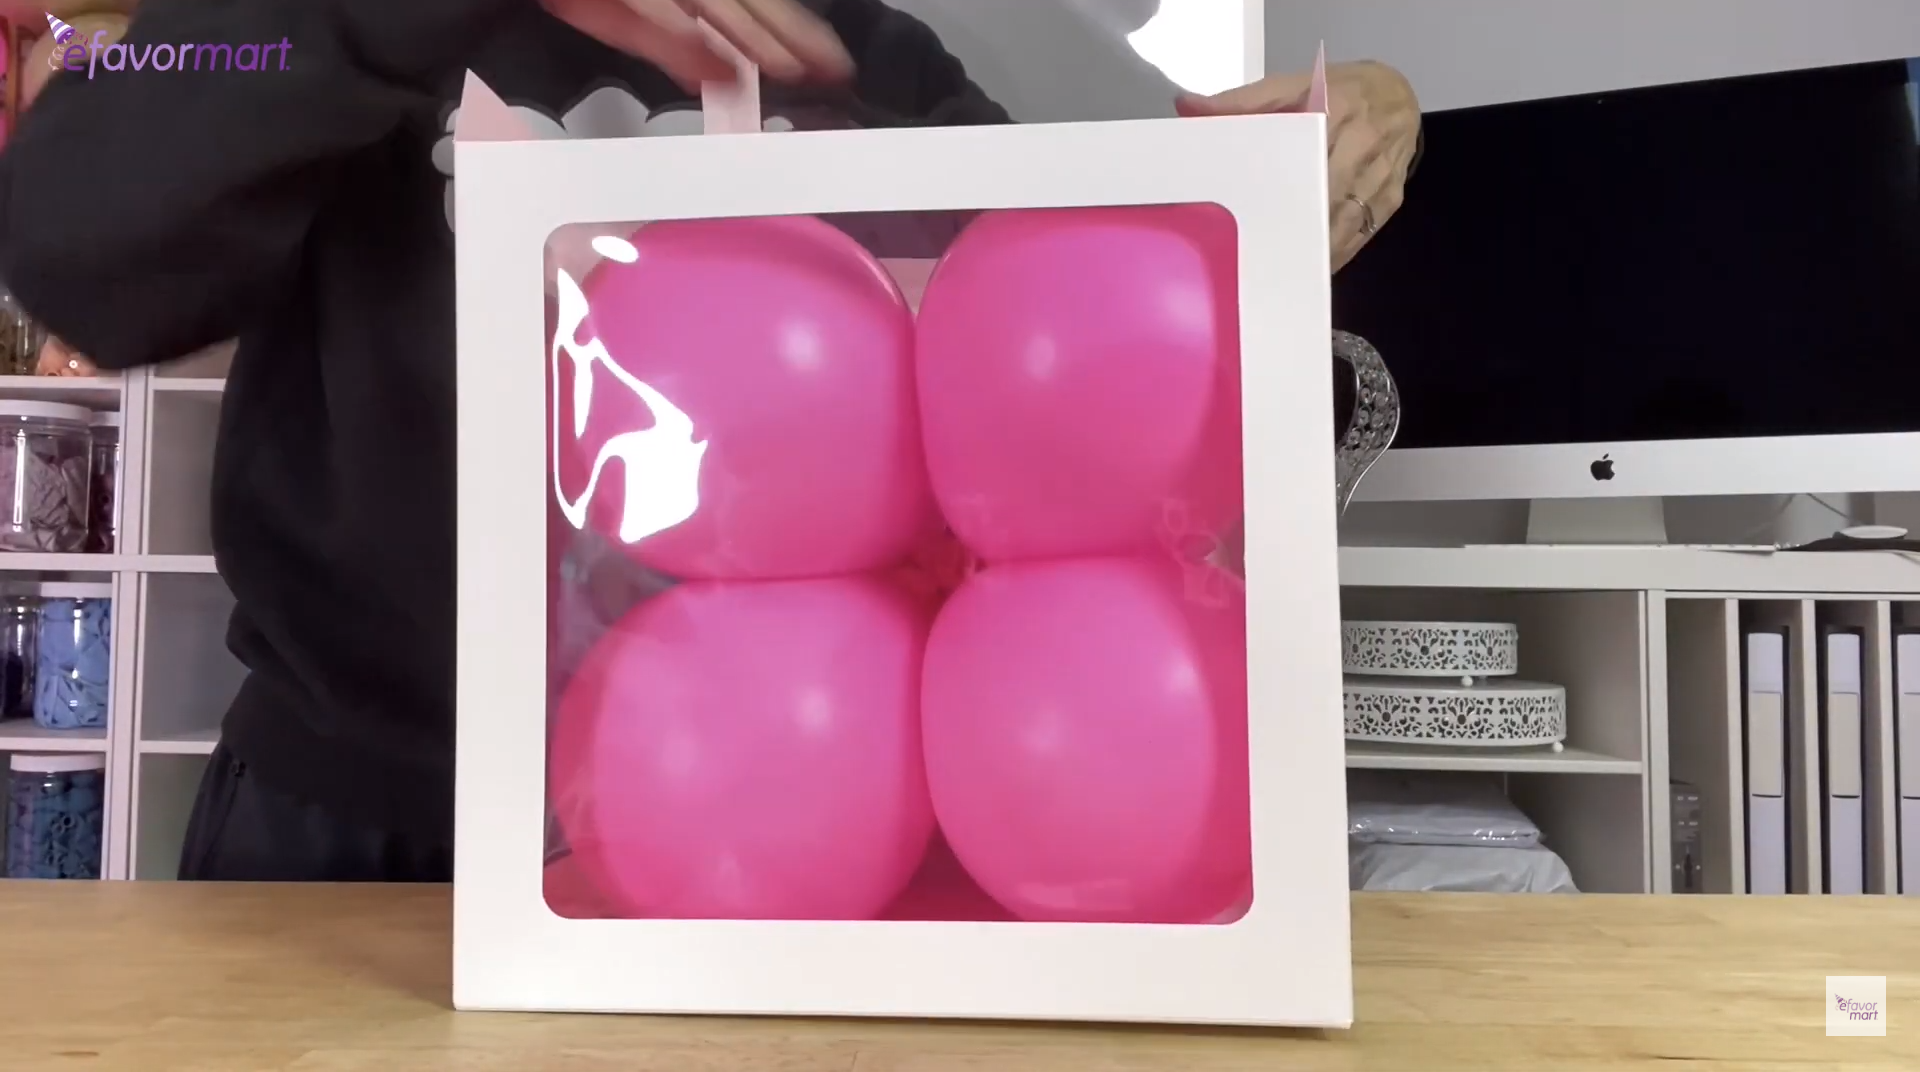
Gently place the inflated pink latex balloons into the transparent boxes. Aim for a consistent look by using only pink balloons, which will give a soft and uniform appearance to your decor. Arrange them neatly inside each box to maximize visibility and create an elegant monochromatic effect. This will ensure a cohesive and charming visual for your baby shower celebration.
Step 4: Add the Letter Stickers

Choose metallic iridescent letter stickers to spell out a name or a sweet message like “BABY” across the boxes. Stick them onto the boxes’ exterior, making sure each letter is straight and centered for a professional look.
Step 5: Assemble the Balloon Wall
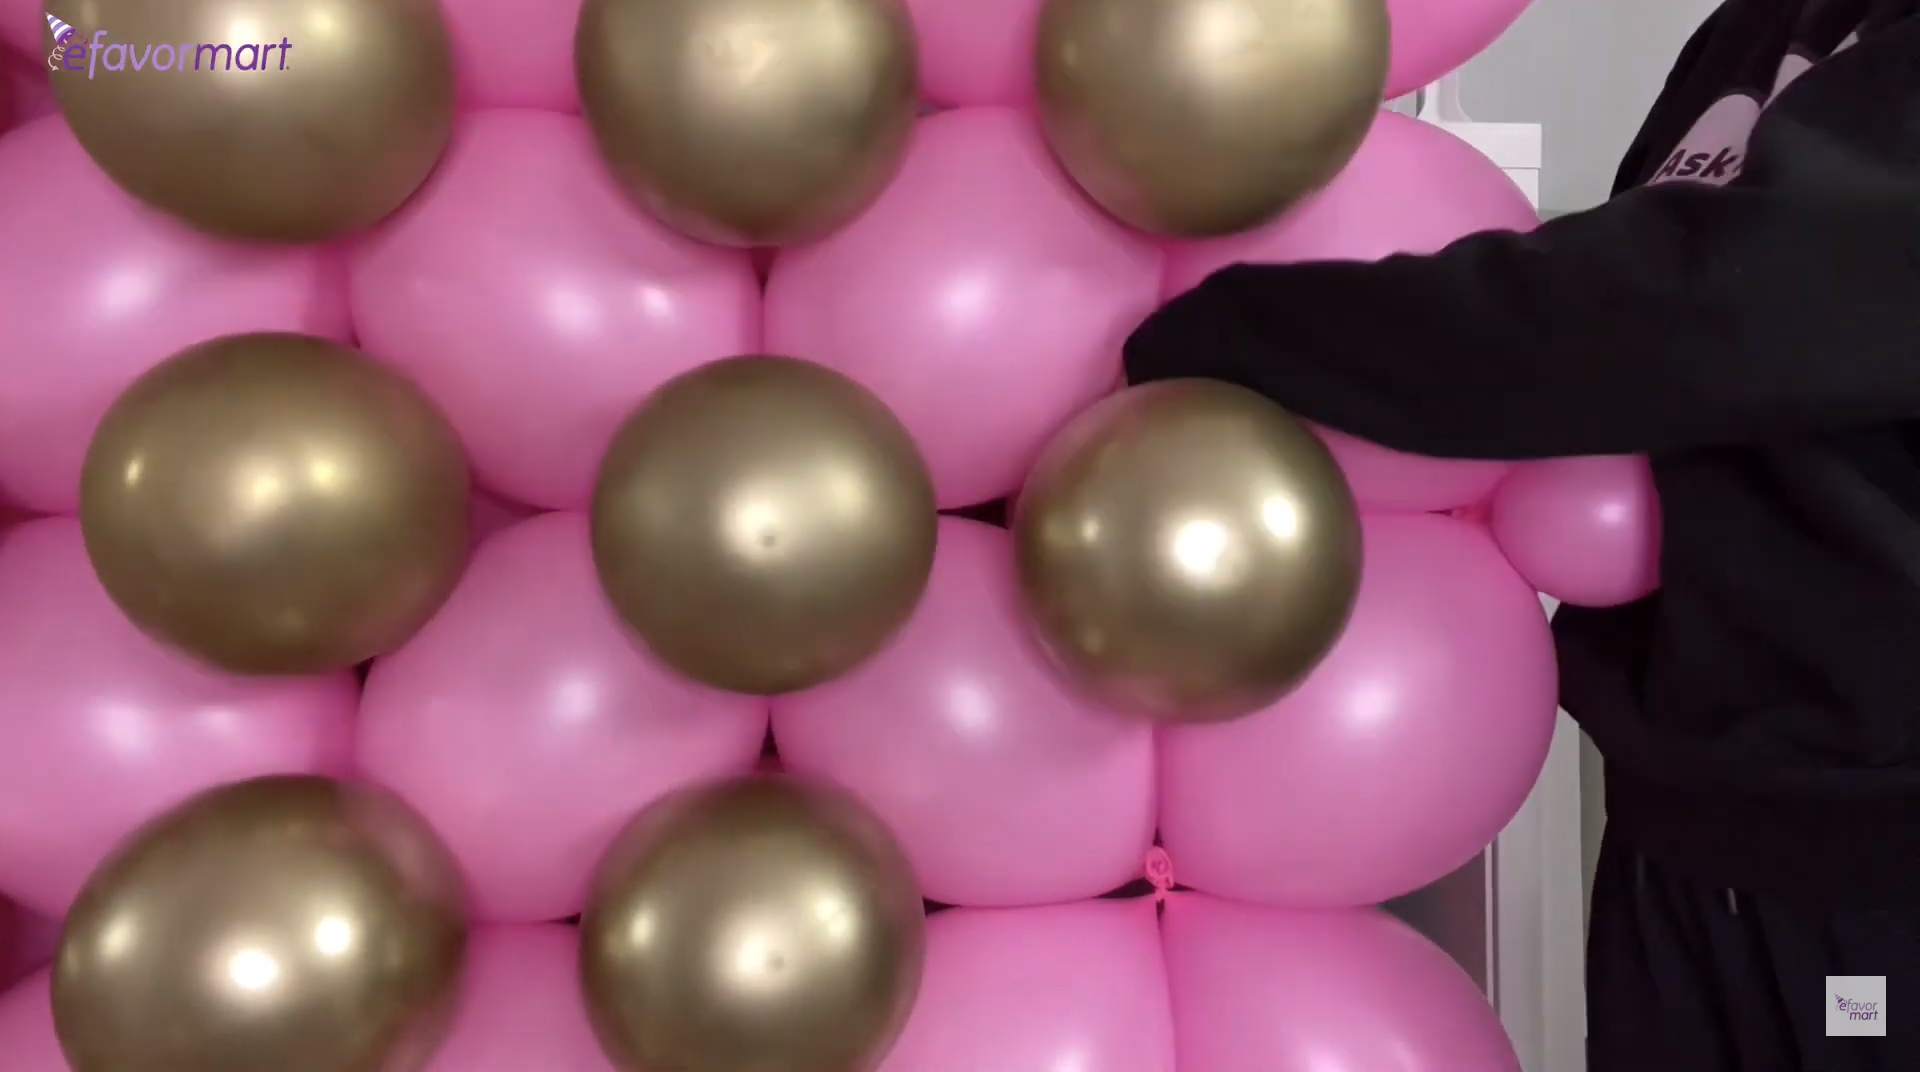
Now, let’s create a captivating backdrop with your balloons. Inflate the pink latex balloons and tie them end-to-end to create long chains. These chains will form the main structure of your balloon wall. Once your pink base is complete, it’s time to add some sparkle with the metallic chrome gold balloons. Intersperse these gold balloons throughout the pink layer, placing them at varying intervals to create an elegant pattern.
Step 6: Secure and Adjust
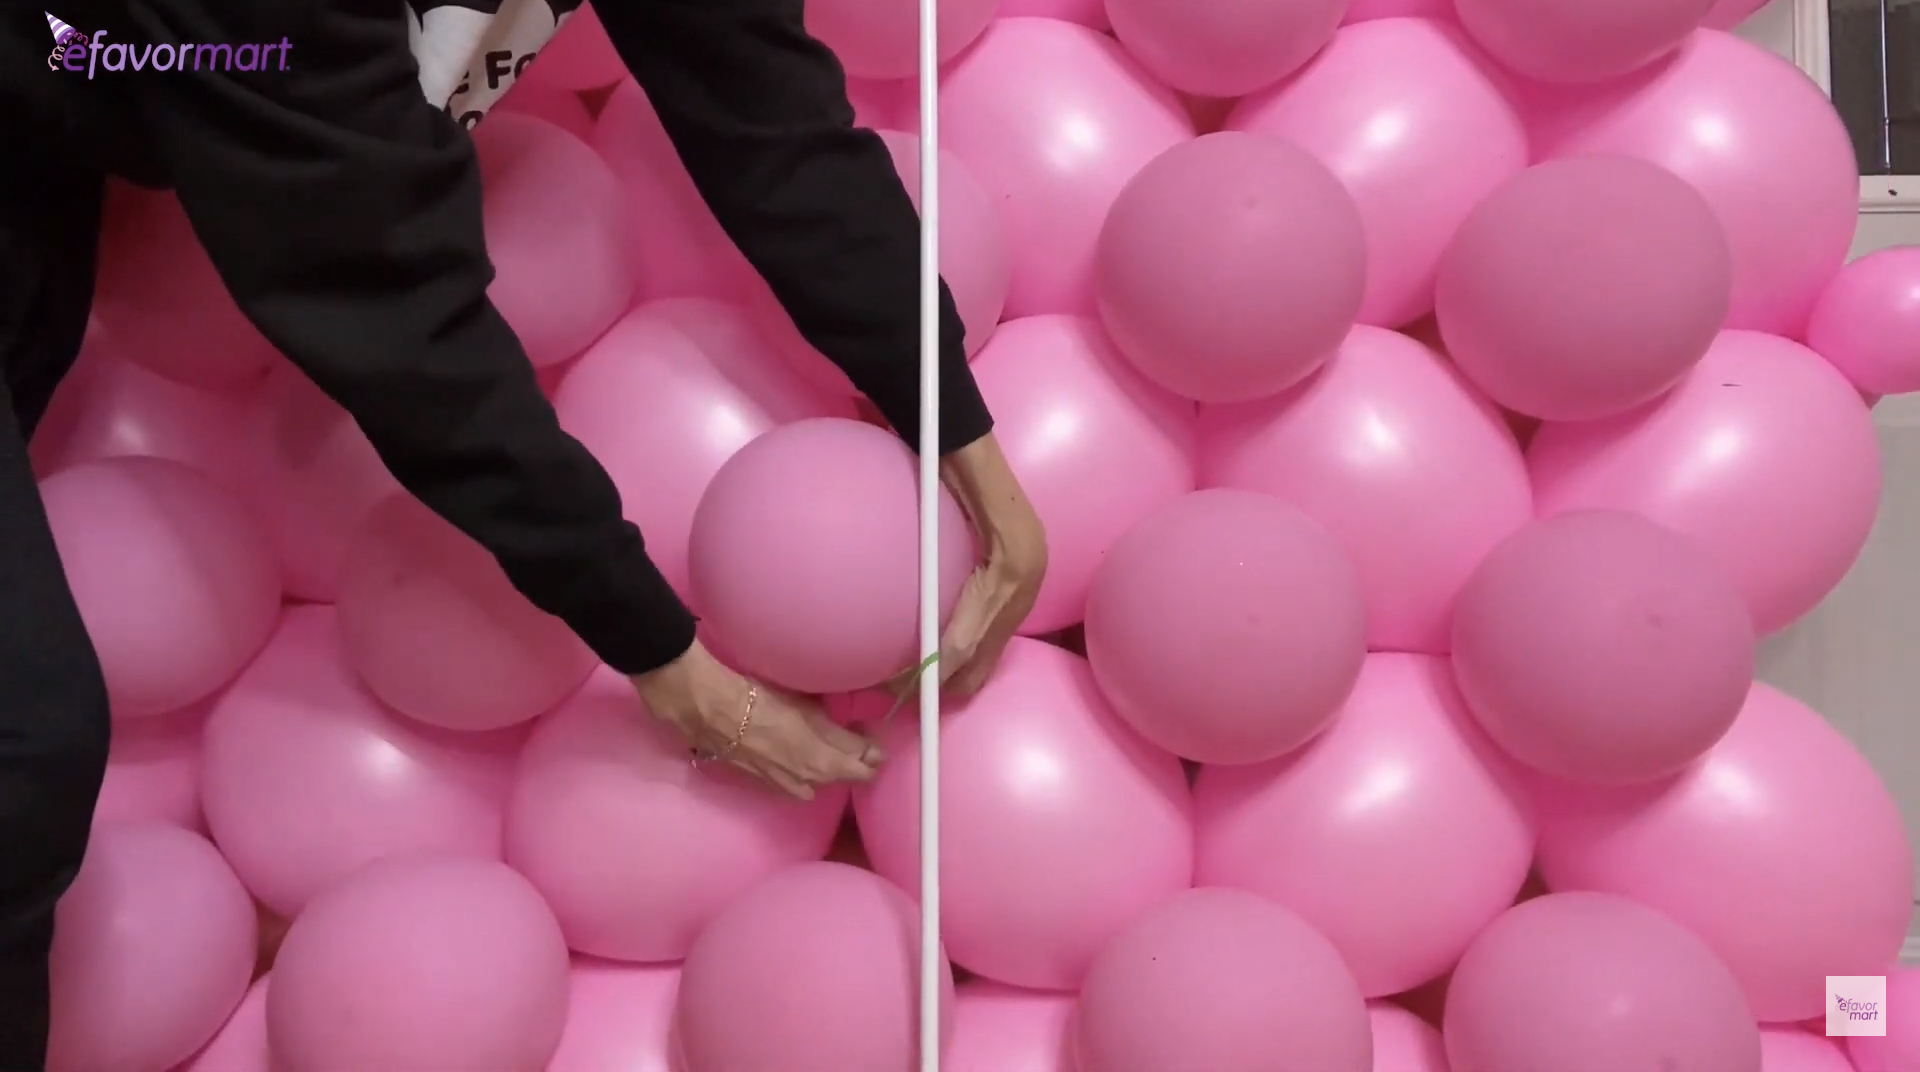
After all balloons are in place, step back to view the overall arrangement. Make any necessary adjustments to the placement of the balloons to ensure a balanced and pleasing aesthetic. Secure the balloon decor to a balloon column stand, and add additional tape if needed to keep the balloons in place.
And there you have it—a step-by-step guide to creating a baby shower that’s as special as the occasion itself. Remember, these are just the basics to get you started. For more creative ideas and detailed tips, be sure to explore our other blogs. They’re packed with inspiration and advice to help you elevate any event. Whether you’re planning a baby shower, a birthday bash, or any celebration, we’ve got you covered. So go ahead, let your imagination run wild, and create an event that’s truly one-of-a-kind!