It’s no secret that efavormart.com offers a huge selection of curtains, which couple exceptional quality with rock-bottom prices. From blackout drapes to gold sequin curtains, our curtains will meet and exceed your expectations, no matter how high they are. Whichever window treatments you choose, make no mistake – they won’t be complete without a stylish curtain rod, which will double as a prop for your draperies and as a means of décor. Fortunately, there’s no need to look any further – we’ve got you covered with a vast range of curtain rod sets, which are sure to bring timeless elegance into any space.
Whether you go for metal adjustable curtain rod set with round finials, chocolate brown marble finials, gold designer finials, silver teardrop finials, or gold lantern finials, you may rest assured – designed to inspire your creativity, they are extremely easy to install!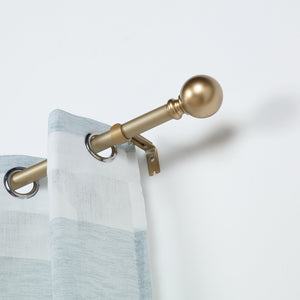
The Needed Supplies
Before proceeding with the installation, make sure that you have all the necessary supplies. By purchasing one set, you’ll get:
- 1 adjustable curtain rod (3 sections of 42 inches each);
- 2 finials;
- 6 screws;
- 6 anchors.
Besides the items mentioned above, you’ll also need:
- Pencil;
- Level;
- Measuring tape;
- Screwdriver;
- Drill and drill bits.

How to Assemble the Rod
Once everything is at hand, set the ball rolling with the assembling of the curtain rod. Since all our curtain rods can be adjusted to different widths, first up, you’ll have to decide on the desired width, which you can do by following this easy formula: the width of your window + the desired distance between the right finial and the window frame + the desired distance between the left finial and the window frame. When deciding on the distance between the finials and the window frame (extension), please bear in mind that it always depends on your curtains and how big you want your window to look. For example, if you are dealing with our blackout curtains, it’s advisable to go for a 12-inch extension. For our lace curtains, 3-4 inches are enough.
Once you settle on the desired width of your curtain rod, move on to the assembling of the rod. If you need a rod, which doesn’t exceed 81 inches wide, you’ll have to use one small-diameter and one large-diameter section. The third one can be discarded or stored.
To get a longer rod, you’ll have to do the following:
- Unscrew a finial from the smaller section of the rod;
- Transfer the finial to the larger diameter section;
- Then, assemble 3 rods with the smaller one in the middle (you’ll need just to insert the smaller rod into the larger ones);
Once your rod is ready, there are a few more steps to make:
- Extend your curtain rod to the desired width;
- Remove the finials and shift a drapery treatment onto the rod (you can find plenty of these in our collection of curtains);
- Screw the finials onto the rod and rotate for proper alignment.
How to Mount the Brackets
Before proceeding with the installation, decide on how far from the upper window frame you want your curtain rod to be. Hint: it depends on the length of your curtains, and how big you want your window to look. Though it’s common to install a curtain rod halfway between the ceiling and the upper part of the window frame, please bear in mind that the closer to the ceiling you install your curtain rod, the taller your room will look. Once you have decided on where to position the brackets, do the following:
- Use a pencil to mark the top holes of the curtain rod brackets;
- Place the top hole of the bracket over the top point and mark the bottom point;
- Make sure that the marks are level across the opening;
- Drill the marked points.
- If you hit a stud, drill 1/8-inch holes and install screws through the brackets. If the wall is hollow, make 3/16-inch holes, push or hammer plastic anchors into the holes, and install screws through the brackets
- Once the brackets are in place, simply lift the rod with a window treatment on it, and drop it into the brackets;
- To prevent the rod from moving, lock each rod section into position by tightening set screw by hand until finger tight.
Install a Designer Curtain Rod in Just Half an Hour and Elevate Your Window Treatment Styling